Agua de Jamaica

tCHwMm2UR4irA3DmqSeWkg.jpg

I’m not sure how I missed this drink. I was probably busy trying all the different flavoured margaritas. Mango, anyone? Tamarind? Passion fruit? Classic?

This was not my first visit to Mexico, but it was the first time being introduced to what has become my new favourite drink, agua de jamaica  (pronounced hah-My-kah).

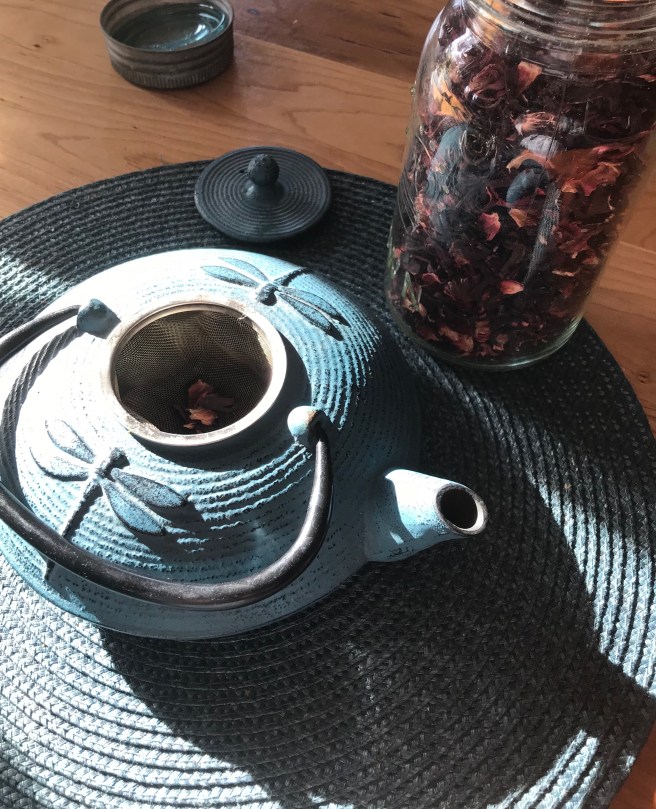
It turns out, jamaica, or hibiscus, is an infusion that is served either hot or cold and is popular all around the world. It is made from the the calyces (sepals) of the roselle or Hibiscus sabdariffa flower.

fullsizeoutput_776.jpeg

I bought bags of jamaica from the little tienda where I was staying for 12 pesos for a 100g bag. It’s available here in health food stores and speciality shops or can be purchased online.

I wasn’t quite expecting the beauty of jamaica when it was first served to me icy cold on a sweltering afternoon. The deep magenta/maroon colour was just so rich and appealing.

Not only is agua de jamaica beautiful, but it’s also thirst quenching and full of Vitamin C.  It’s slightly tart so is often  served with some sugar or honey added. This drink will certainly “up your iced tea” game in the summer, so I thought I’d include a recipe of sorts. This will make about 8 cups.

Agua de Jamaica

Ingredients:

4 cups of water

1/4 to 1/2 cup dried jamaica flowers (hibiscus)

1/2 cup of sugar (or to taste)  *I used less because I rather like the tartness.

Another 3 or 4 cups of water

1 lime thinly sliced

Optional:  1/2 cinnamon stick, thinly sliced ginger, a few allspice berries.

Directions:

Add:  4 cups of water and 1/2 cup of sugar (or to taste) to a saucepan of water. If you are wanting to add some of the optional flavouring ingredients, now is the time to do so. Stir until the sugar is dissolved and bring the water to a boil. Once boiled take the pan off the heat and add 1/4 to 1/2 cup of jamaica flowers. Cover and leave to steep for fifteen to twenty minutes.

Strain the infusion into a pitcher or jug. You can leave this concentration in the fridge and add the additional water when ready to serve or you can do so now. The recommended amount of water to add to this concentrate is 3 to 4 cups depending on the strength you desire.

Serve: Pour into glasses over ice cubes. Add a slice of lime and your agua jamaica is ready to be enjoyed.

If an individual serving of  hot or cold jamaica is desired,  put a pinch of jamaica in  your teapot, add boiling water, and steep for about five minutes. Strain and add sweetener.

fullsizeoutput_77c.jpeg

It’s Not as Easy as It Looks

%ln2FdOoQyS7e19NnZN%FA.jpg

When I saw the drill sheets for week one, I almost laughed. Easy peasy, I thought. In fact, I was wondering if I was going to be bored with this whole learning calligraphy thing.

And then I started. Who knew? First of all, it took weeks of detective skills to track down the special pens I could choose: big brush, small brush, hard tip, soft tip, pointed pen, nib holders… and the list goes on and on. Even Amazon seems to have to look to Japan for some of the pens. The ones I ordered on February 3 have still not made it here yet. And that’s just the pens.

I’ve also been visiting paper supply stores and “petting” all of their stock feeling for just the right smoothness. Most of the papers we use all the time are quite abrasive and can apparently wreak havoc on pen nibs and tips. Rhodia has  a paper that is very smooth, a high grade vellum. Pens just seem to want to write on this surface.

The drills started this past Monday and were accompanied by a video. How hard can this be? A simple upstroke and downstroke and a combination stroke. It turns out, it can be very hard! There’s slant and pressure and holding the pen in the right way to get those nice thin and thick lines. Just to demonstrate, I am showing you some of my first results.  Yes, those ARE “drunken cobras” you are seeing where a downstroke should be.

IMG_8645.JPG

Now that I’ve been humbled, I can see I have work to do. Apparently people can become quite tense while practicing and some people have suggested a glass of wine and relaxing music. I can do that. My teacher has suggested yogic breathing as being helpful too in getting the right speed and rhythm. Inbreath up, outbreath down. You laugh, but this is probably the most helpful piece of advice I’ve received so far. It seems we all go way too fast, especially in the beginning. Isn’t it amazing that in calligraphy, as in most things in life, the secrets to success  are the same:

  • Relax
  • Breathe deeply
  • Exercise

If anyone else is interested in learning calligraphy, I have included the link here to the online course I’m following.

fullsizeoutput_61a.jpeg

Fragments

Weaving in the Ends

I started this scarf/shawl while my mother was dying in the hospital. Knitting was a way to calm myself while accompanying my mother on her last days. And I think it calmed her too.  Knit, purl, knit….. a steady incantation in a predictable pattern, like breathing.  Knitting was one of the womanly arts that was big in my mother’s life and in her mother’s life before her.

It is now March and the scarf is almost finished. It continued to work its magic over the months since my mother’s passing as memories of a long life lived arose and faded while I knit.  I’ve had a hard time finishing it, but I have a hard time finishing most things. Now it’s time to weave in the ends of which there are many, as you can see. Fitting, I guess.

fullsizeoutput_5da

The Crows are Gathering

The spring migration of crows has reached our area. Now as I lie in bed in the early morning light, I hear the birds awaking too. The crows have been the first to break winter’s silence. Robins won’t be far behind. Migrations are happening as they should which feels comforting in a world so full of bluster and chaos these days.

Something New

I have some new socks on my knitting needles. I joined the Handmade Sock Society during the winter. I just loved the name. It speaks of a different time when people gathered for simpler reasons. Except now, of course, we gather online – hashtag handmadesocksociety. I love knitting socks, they suit my practical nature.  I rarely knit socks with patterns, but I’m making an exception so that I can be a society girl.

1ocl2V1KS4Og76KKMNWrCg.jpg
Winter Rose socks.

And…

h3+toN3XSkyi2gjQA%Gn5A.jpg

Today I start learning calligraphy.  I’ve always felt this pull to create with my hands. It’s something passed down to me from my mother’s lineage – they were knitters, and dressmakers and midwives.

I guess all of this is just another way to weave in the ends.

IBhDx7b+T+eEIQX3fL6dDg.jpg

Time to Pick the Greenery

Decorating for the holiday season always begins outdoors for us. The timing depends on the weather forecast and involves putting up the outdoor lights and gathering the boughs for the wreath. (The indoor boughs don’t come in until closer to Christmas to avoid a crinkly mess of dried greenery and loose needles.)

The gifts of the natural world are what I want to surround myself with during the holiday season. My go to favourites are poinsettias and green boughs from the woods. Add a few fairy lights and the house is almost decorated. We are fortunate here to have a nice selection of evergreens to use for decorating.

I use a metal frame for the wreath on the door. The inner channel is filled with hemlock boughs. Hemlock is the softest, most flexible green that grows in our woods. This  year the hemlock is full of small  cones which makes it especially pretty.


IMG_0752
The hemlock comes decorated with its own cones this year.

Once the inner channel of the metal frame is wired in with hemlock, I usually begin adding an assortment of other greenery.

IMG_0756.JPG

I thought I would show you some of my choices to add to the hemlock to make a fuller wreath.

IMG_0760
Classic spruce with its Christmas smell.

OR

IMG_0763
Feathery white pine.

OR

IMG_0768
Cedar, one of my personal favourites. Fragrant and long lasting.

I have lots of good options as you can see. But there is something I am just loving about the simplicity of the hemlock all by itself this year.

IMG_0758
A simple hemlock wreath adorned with its own cones. Pure simplicity.


Socks and Soup

Hygge: A quality of cosiness and comfortable conviviality that engenders a feeling of contentment or well-being (regarded as a defining characteristic of Danish culture).

This first week of wintery weather has seen me getting my “hygge” on. I’ve moved a little closer to the fire and taken out my knitting needles again.

I’m not sure what it is about knitting socks. I made my first pair about three years ago and can’t seem to stop knitting them. (Maybe it’s my practical Virgo nature.) I find it impossible to imagine anyone not loving a pair of warm, wool socks to lounge around the house in when the temperatures outside dip below freezing. That said, I’m not sure anyone outside my family has the same love affair with socks, but that hasn’t stopped me from giving them as gifts. I started this pair in the summer but didn’t make any serious progress on them until last week when winter set in.

fullsizeoutput_3da.jpeg

This brings me to another staple in our house during the inside months when “hygge” becomes a lifestyle in our home. Lunch is only a ladle away when there is a fresh pot of soup simmering  on the stove. I make soups at least once or twice a week during the winter months. Awhile back as I was scanning my shelves for the ingredients for my next soup, I came across the red lentils and for some reason remembered one of my favourite soups that I used to make regularly “way back in the day” but hadn’t made for years. It is one of the recipes from the cult classic Diet for a Small Planet by Frances Moore Lappé. It’s not in the small paperback original (pictured here) but in a later edition. Luckily, I had made it so many times that I was able to re-create it from memory, but just recently found it online at Food 52. They seem to think it’s just as good as I do. It is the simplest, most forgiving soup you could possibly make – raised a notch or two by the secret ingredient, a 1/4 cup of sherry added at the end.

IMG_0739.JPG

IMG_0741.JPG

Lentils Monastery Style

  • Servings: 4 to 6
  • Difficulty: easy
  • Print

A richly flavoured lentil soup made from basic kitchen ingredients with sherry added at the end.

Credit: Diet for a Small Planet (Ballantine Books, 1991). Adapted slightly by Food 52 (and me).

Ingredients

  • 2 tablespoons of olive oil
  • 1 large onion
  • 1 carrot chopped
  • 1/2 teaspoon dried thyme
  • 1/2 teaspoon dried marjoram
  • 3 cups stock
  • 1 cup red lentils, rinsed
  • Salt and pepper to taste
  • 1/4 cup chopped fresh parsley
  • 398 ml can of tomatoes
  • 1/4 cup dry sherry
  • 2/3 cup grated Swiss cheese

Directions

  1. Heat oil in a large pot and sauté the onions and carrot for 3 to 5 minutes, until softened and onion is translucent. Add dried herbs and sauté 1 minute. Add stock, lentils, salt, pepper, parsley, and tomatoes. Cook, covered until lentils and carrots are tender, about 35 to 40 minutes. Add sherry. Check for seasoning.
  2. To serve, ladle into bowls and add two tablespoons of cheese  on the top of each one.

IMG_0745.JPG

*This recipe is very, very forgiving. Want more carrots? Onions? No problem. Too thick for your taste, add more stock. I always add a pinch of salt and pepper as I go along. The amount depends to a large extent on taste and the saltiness of the stock you used. Always, always check the seasoning at the end before serving.

I hope this becomes a household favourite for you too. Enjoy!

I Made a Pie…Blueberry Pie

FullSizeRender 3.jpg

It’s blueberry season here in Quebec. I always freeze blueberries for the winter, but I have never made a blueberry pie. In fact, I rarely make pies at all, so it’s a bit surprising that this summer I have made two.

My 96 year old mother asked for a  Shoo Fly pie for her birthday  this year. (This is an old Pennsylvania Dutch recipe that uses flour and molasses as its base.) My mother has been a pie maker all her life and would think nothing of making pies most days. Me…not so much. Her birthday wish forced me to revisit pie making. I felt it was the least I could do – a little pay back for all the pies she made me over the years.

The problem I have been having with pies lies in the crust. Most of the flaky pie crusts I have tasted made by country cooks are full of vegetable shortening or lard. I am not happy eating or cooking with these fats and long ago switched my allegiance to butter. The few butter crust pies I have made have not been flaky and rolling them out has been something of a nightmare. That is, until this summer.

My daughter and son-in-law gave me this book a few years ago…and well, I am thinking everyone needs this book.

FullSizeRender 2.jpg

The Cook’s Book is full of techniques and recipes mastered by chefs. In this rather heavy book, I found the recipe that has altered my view of making butter crusts or  pâte brisée (shortcrust pastry). This pastry can either be made by hand or in a food processor.  For full disclosure here, I have to tell you I ran into the same problem with this recipe as I did with all of the others I have made. The recipe itself is a breeze and the dough comes together well, but like all shortcrust pastries, they call for it to be chilled in the fridge for at least two hours before rolling. This is where I broke with tradition. I recently read that it doesn’t matter when the dough is chilled – just that it be chilled before baking. I decided to roll the dough while it was still pliable and then chill it in the fridge in the pie pan. Some far better and much more experienced pastry chefs might dispute this, but all I can say is it worked for me. There was far less swearing as I was rolling out the dough and for that alone the switch-up was well worth it.

For this blueberry pie, I had only one crust, so I made it with a crumble top. I combined two online recipes  that I found for blueberry crumble pie – one from Epicurious and one from Allrecipes. I used the filling recipe and the baking temperature and time  from All Recipes and the crumble topping from Epicurious.  It turned out well. The crust was flaky and the pie delicious.

I just might turn into a pie maker after all.

Pot Luck Star

I have been a bit of a pot luck star this summer and I’m going to make you one too. Our summer gatherings here in the country tend to be pot lucks. It is an easy, affordable way for people to gather for a meal on a warm summer evening. Except for this year, I have been much more likely to bring something savoury to share rather than something sweet. That all changed when I intercepted this recipe being shared online by Canadian cook, Laura Calder, who self confessed that she couldn’t stop making them. Of course, that piqued my interest and the total simplicity of the recipe settled it for me. Since making these cookies, I have noticed that there are a number of different variations online. Some of them use salt, vanilla extract and cream of tartar,  but I find this recipe is just fine as is. I like adding the unsweetened sifted cocoa because it does seem to cut the sweetness a bit. Enjoy!

IMG_2887 Chocolate Chip Meringues (photo credit kd7167)


Chocolate Chip Meringues

Ingredients:

3 egg whites

1 cup of sugar

2 T sifted cocoa

170 g dark chocolate chips

Optional: small handful or scant 1/4 cup of roasted sliced almonds

Directions:

Whip 3 egg whites while beating in a cup of sugar a spoonful at a time. The mixture should become thick and glossy. (This usually takes about 8 minutes.) The mixture shouldn’t taste granular at this point. Fold in the sifted cocoa, the chocolate chips and the nuts if you choose to do so. Drop by spoonfuls onto parchment lined cookie sheets.

Bake at 275 for 35 minutes. 


Rhubarb Reborn – A Recipe of Sorts


IMG_2658.JPG
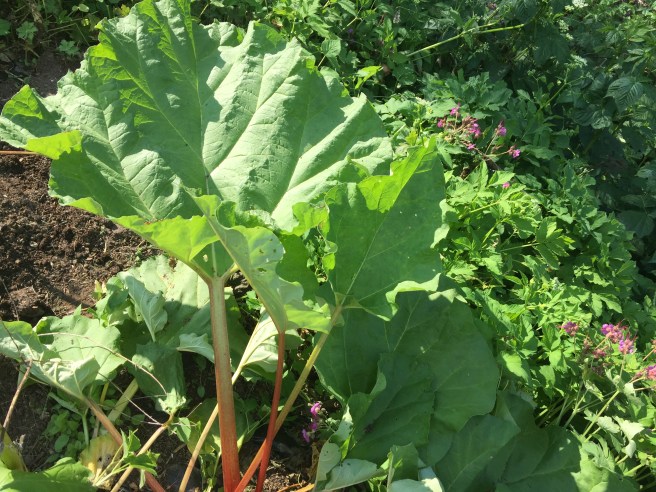
Rhubarb (Rheum rhabarbarum)

Do you have a recipe or cooking technique that you discovered a long time ago and still use today? This is one of those for me: both a recipe and a technique that I haven’t seen improved upon since I discovered it way back in 1978.

Rhubarb is one of the first food plants to be harvested from gardens in these parts. It is not a true fruit but is prepared in kitchens as if it were. Rhubarb has been perfected as an ingredient in pies, cakes, crisps and cobblers (often in combination with strawberries) but the simplest preparation, commonly known as stewed rhubarb, has not traditionally been a very appetizing way to eat this fruit. It is often stringy and cooked into a sloppy mush that lacks the beauty and integrity of the real fruit with its firm red and green stalks.

Way back in June of 1978 from a publication at the time called Organic Farming and Gardening, I ran across this recipe called Rhubarb Reborn. (I wish I could give credit here to the person who contributed the article but I only have one very yellowed and food stained page.)  All I can say is that this recipe gave me a whole new rhubarb eating experience. Simple is often the best.  Trust me, this recipe will be in your repertoire for a long time.

fullsizeoutput_204

Rhubarb Reborn – The Recipe

To make Rhubarb Reborn you will need about a pound of rhubarb stalks, so think about 4 cups of diced fruit. The recipe is easily adaptable as you’ll see so use whatever you have on hand. Don’t peel any of the stalks as the beautiful red adds colour to the prepared fruit. All the stalks need to be split lengthwise, even the very small ones. The large ones can be split four or six times. Each split section should be about 1/2 an inch wide. (This seems to prevent any stringiness.) Stack a bundle of the split stalks and slice about 1/4 inch wide. Now you are ready to measure your diced fruit and add honey. The proportion of sweetener to diced fruit is a matter of taste. For a tart sauce, use 2/3 cup of honey to four cups of diced fruit. For a sweeter, richer sauce use 2/3 cup of honey to two cups of diced fruit. I find the more tart version plenty sweet enough for my taste. The prepared fruit needs to soak  for at least an hour so all the cut surfaces can soak in the honey – a couple of hours is even better or overnight is ideal. You’ll notice that the juices from all those cut surfaces combines with the honey.

IMG_2641.JPG

This part of the recipe is really important. Quickly bring the diced fruit to a simmer  and let it simmer for barely a minute.

IMG_2643.JPG

Remove it from the heat and put on a lid. The fruit continues to soften in the hot syrup. Don’t overcook it. Et Voilà, finished! If you wish you could add some cinnamon or ground ginger for a little extra flavouring, but I like mine just like this.

IMG_2670.JPG 
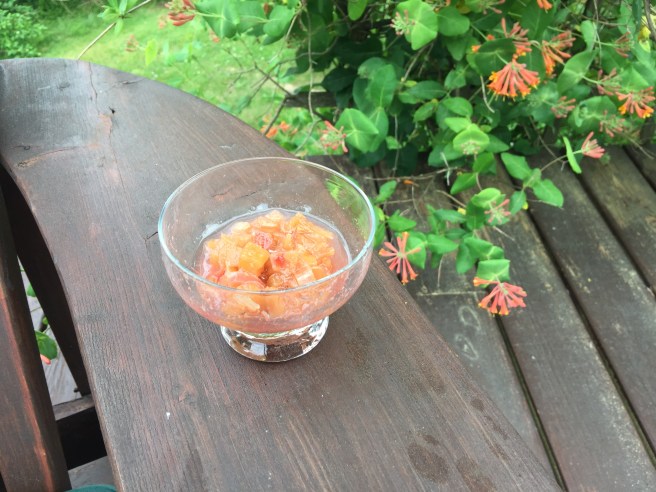
The colour of the prepared rhubarb mimics the climbing honeysuckle in this picture.

This preparation freezes really well and looks and tastes the same unthawed as when originally prepared. It is delicious alone but can be added to yogourt or granola for a seasonal breakfast or eaten with ice-cream for a sweeter dessert later in the day. Add a tablespoon or so of the sweetened sauce  to a glass of sparkling water for a refreshing summer drink on the patio.

 IMG_2666.JPGThe sauce gives the sparkling water a beautiful pink hue.

Rhubarb Reborn can also be made unsweetened and used in meat sauces or other dishes. For this preparation cut it the same way but instead of honey simmer it in a few tablespoons of orange juice.

Do you have a favourite way of preparing rhubarb? I would love to hear about it.