There Are Times Like This

I’m back! I didn’t take an intentional break from this blog, it just happened. It’s the first time since starting to write here that I haven’t posted at least once a week. It feels as if I’ve neglected a best friend.

The end of June saw us madly getting our country property ready for a three week trip to Europe to visit family. I realize I like to write more reflective pieces and being in pre-departure chaos was about as far from being reflective as it gets. I know  that shouldn’t have stopped me from writing. You might have liked seeing some of the chaos in my life – makes it a whole lot more real!

Getting ready to leave on a trip at the end of June in this crazy, intense climate means that gardens have to be planted, lawns mowed, outdoor furniture painted and repaired, and the pool systems checked. It also involves enlisting a small army of people to come and take care of things while we are away.

You might think from the above that we’re super organized and maybe even a little smart, but this has only come about from a whole series of disasters in the past. We returned one year to a green pool that took the whole rest of the summer to return to its original blue and be swimmable.  We have also returned to gardens that were so overrun with weeds that I wanted to weep.

Since I didn’t take you along  with my words, I thought I would share some pictures of our adventures this last month.

f86fe02e-e764-4f9e-a29b-4b10746b9c90.jpg
We started out in the UK but quickly winged our way to Menorca for a family beach holiday.

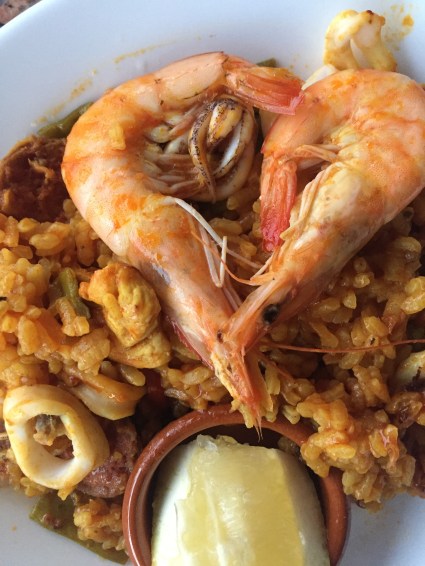
The days were full: swimming, playing in the sand, going to the wading pool. In between, we tried to catch glimpses of the World Cup soccer matches and make some delicious adult food.

IMG_1753
This paella made by my son-in-law was by far the hit meal of the holiday.

Back in the UK, where it was nearly as hot and dry as Menorca, we found shade and quiet amongst the huge, old-growth trees at Kew Gardens.

z%OeZYk5QoSehudCCZsUTQ.jpg
The twins looking at “stuff”.

As these things go, our time together came to an end. We left with heavy hearts… and very tired bodies.

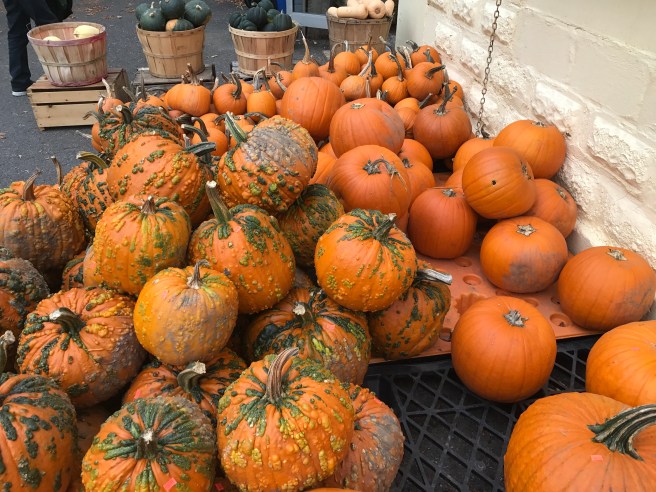
We returned home to flower gardens that had completely changed their colours and a vegetable garden rewarding us for the long days of work in June.

2yBL0i2GRuKh7ijpJRrumw.jpg

IMG_2730.JPG

…………….

Sometimes I wonder how we got so lucky.


Agua de Jamaica

tCHwMm2UR4irA3DmqSeWkg.jpg

I’m not sure how I missed this drink. I was probably busy trying all the different flavoured margaritas. Mango, anyone? Tamarind? Passion fruit? Classic?

This was not my first visit to Mexico, but it was the first time being introduced to what has become my new favourite drink, agua de jamaica  (pronounced hah-My-kah).

It turns out, jamaica, or hibiscus, is an infusion that is served either hot or cold and is popular all around the world. It is made from the the calyces (sepals) of the roselle or Hibiscus sabdariffa flower.

fullsizeoutput_776.jpeg

I bought bags of jamaica from the little tienda where I was staying for 12 pesos for a 100g bag. It’s available here in health food stores and speciality shops or can be purchased online.

I wasn’t quite expecting the beauty of jamaica when it was first served to me icy cold on a sweltering afternoon. The deep magenta/maroon colour was just so rich and appealing.

Not only is agua de jamaica beautiful, but it’s also thirst quenching and full of Vitamin C.  It’s slightly tart so is often  served with some sugar or honey added. This drink will certainly “up your iced tea” game in the summer, so I thought I’d include a recipe of sorts. This will make about 8 cups.

Agua de Jamaica

Ingredients:

4 cups of water

1/4 to 1/2 cup dried jamaica flowers (hibiscus)

1/2 cup of sugar (or to taste)  *I used less because I rather like the tartness.

Another 3 or 4 cups of water

1 lime thinly sliced

Optional:  1/2 cinnamon stick, thinly sliced ginger, a few allspice berries.

Directions:

Add:  4 cups of water and 1/2 cup of sugar (or to taste) to a saucepan of water. If you are wanting to add some of the optional flavouring ingredients, now is the time to do so. Stir until the sugar is dissolved and bring the water to a boil. Once boiled take the pan off the heat and add 1/4 to 1/2 cup of jamaica flowers. Cover and leave to steep for fifteen to twenty minutes.

Strain the infusion into a pitcher or jug. You can leave this concentration in the fridge and add the additional water when ready to serve or you can do so now. The recommended amount of water to add to this concentrate is 3 to 4 cups depending on the strength you desire.

Serve: Pour into glasses over ice cubes. Add a slice of lime and your agua jamaica is ready to be enjoyed.

If an individual serving of  hot or cold jamaica is desired,  put a pinch of jamaica in  your teapot, add boiling water, and steep for about five minutes. Strain and add sweetener.

fullsizeoutput_77c.jpeg

Socks and Soup

Hygge: A quality of cosiness and comfortable conviviality that engenders a feeling of contentment or well-being (regarded as a defining characteristic of Danish culture).

This first week of wintery weather has seen me getting my “hygge” on. I’ve moved a little closer to the fire and taken out my knitting needles again.

I’m not sure what it is about knitting socks. I made my first pair about three years ago and can’t seem to stop knitting them. (Maybe it’s my practical Virgo nature.) I find it impossible to imagine anyone not loving a pair of warm, wool socks to lounge around the house in when the temperatures outside dip below freezing. That said, I’m not sure anyone outside my family has the same love affair with socks, but that hasn’t stopped me from giving them as gifts. I started this pair in the summer but didn’t make any serious progress on them until last week when winter set in.

fullsizeoutput_3da.jpeg

This brings me to another staple in our house during the inside months when “hygge” becomes a lifestyle in our home. Lunch is only a ladle away when there is a fresh pot of soup simmering  on the stove. I make soups at least once or twice a week during the winter months. Awhile back as I was scanning my shelves for the ingredients for my next soup, I came across the red lentils and for some reason remembered one of my favourite soups that I used to make regularly “way back in the day” but hadn’t made for years. It is one of the recipes from the cult classic Diet for a Small Planet by Frances Moore Lappé. It’s not in the small paperback original (pictured here) but in a later edition. Luckily, I had made it so many times that I was able to re-create it from memory, but just recently found it online at Food 52. They seem to think it’s just as good as I do. It is the simplest, most forgiving soup you could possibly make – raised a notch or two by the secret ingredient, a 1/4 cup of sherry added at the end.

IMG_0739.JPG

IMG_0741.JPG

Lentils Monastery Style

  • Servings: 4 to 6
  • Difficulty: easy
  • Print

A richly flavoured lentil soup made from basic kitchen ingredients with sherry added at the end.

Credit: Diet for a Small Planet (Ballantine Books, 1991). Adapted slightly by Food 52 (and me).

Ingredients

  • 2 tablespoons of olive oil
  • 1 large onion
  • 1 carrot chopped
  • 1/2 teaspoon dried thyme
  • 1/2 teaspoon dried marjoram
  • 3 cups stock
  • 1 cup red lentils, rinsed
  • Salt and pepper to taste
  • 1/4 cup chopped fresh parsley
  • 398 ml can of tomatoes
  • 1/4 cup dry sherry
  • 2/3 cup grated Swiss cheese

Directions

  1. Heat oil in a large pot and sauté the onions and carrot for 3 to 5 minutes, until softened and onion is translucent. Add dried herbs and sauté 1 minute. Add stock, lentils, salt, pepper, parsley, and tomatoes. Cook, covered until lentils and carrots are tender, about 35 to 40 minutes. Add sherry. Check for seasoning.
  2. To serve, ladle into bowls and add two tablespoons of cheese  on the top of each one.

IMG_0745.JPG

*This recipe is very, very forgiving. Want more carrots? Onions? No problem. Too thick for your taste, add more stock. I always add a pinch of salt and pepper as I go along. The amount depends to a large extent on taste and the saltiness of the stock you used. Always, always check the seasoning at the end before serving.

I hope this becomes a household favourite for you too. Enjoy!

A Cup of Chai?

2016-01-15 16.42.22.jpg

Masala chai is a spiced tea popular in India and now in North America as well. We have shortened the name to chai here but that word actually just means tea. Masala is the spice mixture added to the “chai” to make the drink we have come to love. It is basically a spiced, sweetened tea mixed with milk. It is sold all over India by chai wallahs  (tea vendors) who pour the tea from huge kettles into small cups.

It can now be bought here commercially in many coffee shops, but it is so much better to make at home – and it’s easy. The very best chai I have had has been made in small batches in a big pot heated on the stove. The tea used was loose and the spices fresh. Delicious.

But this post is about my newest obsession, an instant masala chai spice mix that can be brewed in a matter of minutes. Most masala spice mixes contain ginger, cardamom, cloves, cinnamon, pepper, and sometimes fennel and star anise. I sourced my spices from a local health food store, so I know they are the freshest I can find. I proportioned the spices the way the recipe suggested and then mixed them all together. I now have a large jar full of this aromatic goodness that can be made into fresh chai in an instant.

IMG_681.jpg

To brew one cup I use the tea cup I will be drinking from to measure 3/4 of a cup of water into a saucepan and then add 1/4 of a cup of milk. I add a teabag and 1/4 tsp of my chai masala mixture and bring the whole thing to a boil. As soon as it boils, I turn off the heat and let it rest for a minute or so. I pour the steaming chai  through a fine sieve directly into my cup. I add the sugar at the very end. It really does need sugar if you want the more authentic drink.

IMG_0020 2.JPG

Voilà, chai in five minutes or less. And a whole jar of spice mixture waiting for the next cups. How good is that?


Yes Please!

A number of blog posts back I talked about joining the Food52 Cookbook Club. If you missed it and are interested, you can read the post here.

51hWJkQ5WvL._SX386_BO1,204,203,200_

This book was my first purchase and I have been cooking recipes from it for the last month. It is that good! Food52 is a recipe sharing site and I found a recipe from this book there that I thought I would share with you. It is not one of the swoon worthy savoury curries but a very simple, done in fifteen minutes, take anywhere dessert that everyone will love. Think of it as soft macaroon with an Indian twist. The best part: it has only three ingredients. It’s the perfect no fuss dessert for any pot luck gathering.

IMG_0633

Coconut Milk Fudge

  • Servings: 25 to 30 bite sized pieces
  • Difficulty: easy
  • Print

A fairly ancient Gujarati sweet traditionally made using fresh coconut and milk that has been reduced for hours. This is the 3 ingredient adapted version by Meera Sodha

Credit: Food52

Ingredients

  • 1 1/2 cups condensed milk
  • 2 1/2 cups unsweetened desiccated coconut, divided
  • 1/2 teaspoon ground cardamom (or finely ground seeds from 6 pods) 

Directions

  1. Pour the condensed milk into a nonstick saucepan and put it on gentle heat. Stir frequently so that the milk doesn’t stick to the bottom. (If it does burn, the burned bits can taste quite nice, but there is a fine line between nice and horrid.)
  2. When the milk comes to a simmer, add 2 cups of desiccated coconut and the ground cardamom. Keep stirring over a low heat until the mixture starts to look like dough. To test whether it’s ready , pinch a piece off and let cool for a minute to see if you can roll it into a ball. If you can, take the pan off the heat and transfer the fudge to another bowl .
  3. While you wait for the fudge to cool enough to handle it, get a bowl and put the rest of the desiccated coconut into it (to roll the fudge in) and another clean plate on which to put the finished fudge.
  4. When the fudge is cool enough to touch, roll a bit into a small ball. Roll it around in the desiccated coconut and put it onto plate. Repeat with the rest of the fudge.
  5. You can keep these in a clean tub in the fridge for up to a week.
  6. Tip: As a treat for my grandma (who loves Mounds bar), we sometimes melt some good quality chocolate and dunk the fudge into it, using a cocktail stick, then set them in the fridge until hard.

IMG_0628*Additional notes from me: The original recipe is written in British weights and measures and I think the desiccated coconut and condensed milk comes in different sizes than here. The desiccated coconut I bought came in a 200g package and the condensed milk in a 300ml can. I didn’t buy extra to meet the measurements for this recipe because I didn’t want to have leftovers. I took out enough coconut from the bag to roll the fudge in and put the rest into the saucepan with the condensed milk to make the fudge. It seemed to work out fine. There was less milk and less coconut than the recipe called for but it seemed to be in the right proportions.

Enjoy!

It Could Be Addictive…and Expensive

I joined an online cookbook club. It is a Facebook group run by the popular online cooking website called Food52. Every month there is a new cookbook featured and members cook recipes from that book and share the results online – complete with photos and comments. It is a great way to get a feel for whether a cookbook is right for you and get meal ideas at the same time. The first month the cookbook featured was  Salt Fat Acid Heat and was billed more for its techniques than recipes.

51dToE1quFL._SX401_BO1,204,203,200_

I decided that I wouldn’t buy or borrow this one. But as the recipes got posted and the raves started coming in, I wasn’t sure I should have dismissed it so quickly. That’s how er…expensive this club could become.

The book for October is called Made In India by British home cook Meera Sodha.
51hWJkQ5WvL._SX386_BO1,204,203,200_

I LOVE Indian food and don’t have a good cookbook, so I thought I would jump in with this one.  Arriving home late on Wednesday afternoon,  I found the book had already been delivered and was waiting on the bench outside. (It is way too easy to order from Amazon!) I had a few chicken fillets in the fridge for supper that night so went to the chicken recipes and chose one – they all looked fairly easy and I just happened to have tamarind paste (go figure!), so I made Coconut and Tamarind Chicken Curry. I whipped it together in about fifteen minutes. It had a short list of ingredients. The curry flavour itself came from only cinnamon, garlic, ginger, fresh red chilli, ground tumeric and coriander. And it was delicious.

IMG_0405.JPG

I realize I was being held back because I mistakenly believed that to cook good Indian food I would need a whole pantry of hard to find spices and lots of time. Not so.

I have watched as others have posted recipe after recipe with the same great results and rave reviews. I am so excited! And I get to use my authentic hammered silver bowls that a friend gifted me this summer.

To compliment my newly found passion for cooking Indian, I am now thinking I may need this. All my Indian spices in one easy to find place. Brilliant!

814Zi0EcJQL._SL1500_.jpg
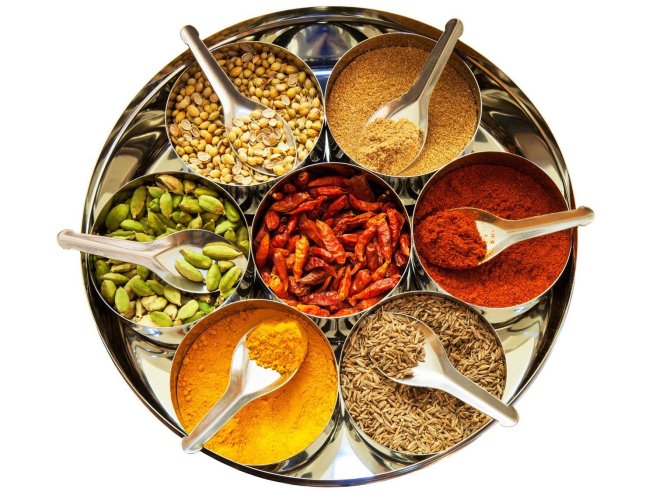
Masala Dabba spice box

Did I mention that this could be addictive….and expensive.?


Is That Thanksgiving Knocking?

Thanksgiving in Canada is always in the beginning of October and it always catches me by surprise. Usually the leaves reaching their peak colour are my visual cue, but this year for some reason, maybe the wet summer and late in the season hot/dry spell, the leaves are mostly still greenish with shades of brown and red spattered in. All this to say, I’m not ready, as usual.

IMG_0401.JPG

The interesting thing about living in Québec is that Thanksgiving is not really a holiday that the Québécois celebrate. I remember teaching English as a second language one year at this time and, by way of making conversation, I asked my adult students how they were planning on celebrating the holiday. One of them said they were going to wash their windows and another that they would be getting their firewood in. “But…what will you be eating?” I persisted.

“The usual,” was my answer. They even looked a  little quizzical that I would be asking such a question. I was a bit dumbfounded. I have been living in this province many, many years and I had no idea my neighbours weren’t celebrating in the same ways we were.

I guess it’s time to muster the Thanksgiving spirit and do a little decorating, bake a pie, buy a turkey…

IMG_0404

I thought I would start by buying a pumpkin since we don’t grow them ourselves. I’m really not sure about these green, warty ones. I chose the one in the foreground with the stem. I really like that classic pumpkin look. While I was here at the wholesalers, I also picked up a few apples in case I decide to make a head start on the pie.

IMG_0408.JPG

I bought honey crisp for eating and a few cortlands to make the pie. I don’t eat apples at any other time of the year  because I only like them when they are at  their ripest best.

Now for the turkey. Time to call Farm to Table and hope I’m not too late.

Or  I could just be like my Québécoise friend and wash my windows instead.

Three Simple Kitchen Tools

We had family visiting last weekend and I was appreciating once again how well the kitchen works. It is not the biggest kitchen nor the most modern, but it is well equipped and functional.

IMG_3062

I have a great selection of knives within arm’s length, the onions and garlic sit in baskets on the counter, and the olive oil and vinegars are an easy reach away. For me, when it comes to cooking, it’s about easy access to all the major kitchen tools. And by this, I don’t mean fancy electric machines. I thought I would show you this morning the three tools I reach for the most often when I am cooking – the ones I can’t do without.

The first is my Santoku kitchen knife.

IMG_3063.JPG
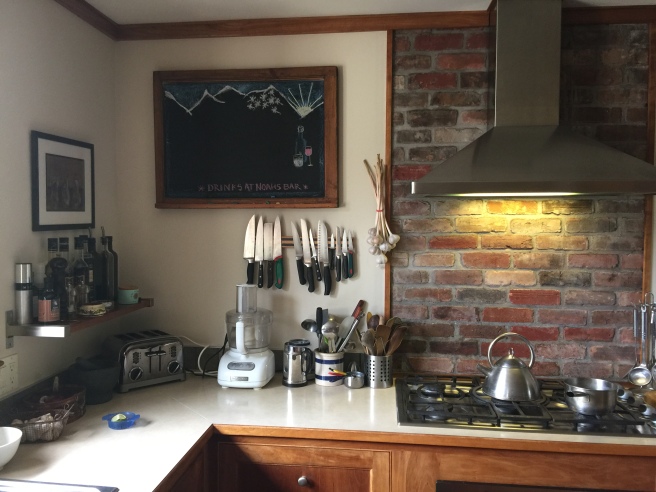
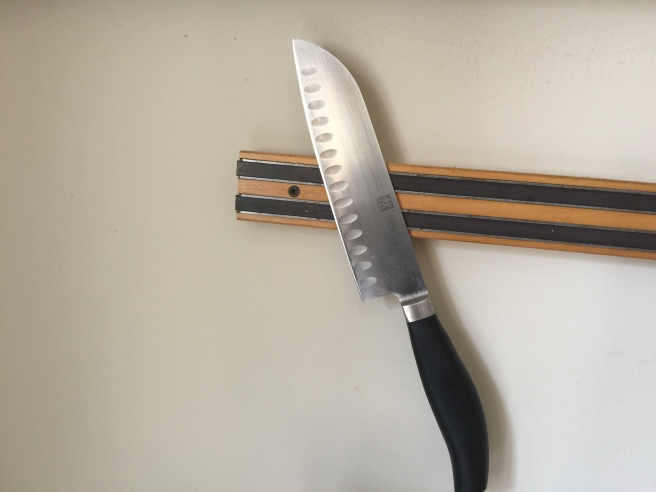
This one is a Henckel 7 inch and is lightweight and always sharp. These knives come in different qualities and at different prices. You use a knife every day, so I would recommend buying the best quality one that you can afford. (That said, I have used cheaper knives that also seem to work just fine.) This Santoku seems to satisfy most of my cutting needs. My advice is to find a knife that works for you. There are many great knives out there, but it has to have a comfortable grip and be the right weight for you. When you find your knife, you won’t look back!

I use this Japanese Benriner mandoline every day.

IMG_3064.JPG

It lives in the drawer below the counter and is simplicity itself: small, portable and easy to clean. I bought it years ago at a Chinese grocery store (Kim Phat for those who might be reading in the Montreal area), but you can order them online at Amazon. I know there are lots of fancier ones on the market, but again I return to my theme of simplicity. They come with multiple blades, but I seem to only use the slicer and it can be easily adjusted for thicker or thinner cuts. I use it to cut cucumbers, onions, radishes, fennel and anything else that requires thin slicing. I also use it to slice potatoes for scalloped potatoes and cabbage for coleslaw. It comes with a plastic guard that really does need to be used, especially when you get near the bottom. The blade is sharp! They come in two widths. The one I have is the narrower of the two, but when I upgrade I will go for the little wider one.

The last simple tool that I use often is this rasp that I bought at Lee Valley Tools years ago.

FullSizeRender 5

It has become a bit dull over the years. This is a testament to how often I use it. Grated parmesan on the rasp is light and airy and you’ll find you don’t need as much as when grating on the regular box grater. Bring it to the table after and allow people to grate their own. It is also a super zester for lemons and limes and makes quick work of ginger and garlic. (If you are interested in purchasing the rasp, I have included the link here.)

Voilà, three simple tools that you might not be able to live without either.

I am wondering if you have a kitchen tool you can’t live without? If so, why not share it in the comments. Maybe I’ll find a new favourite!


I Made a Pie…Blueberry Pie

FullSizeRender 3.jpg

It’s blueberry season here in Quebec. I always freeze blueberries for the winter, but I have never made a blueberry pie. In fact, I rarely make pies at all, so it’s a bit surprising that this summer I have made two.

My 96 year old mother asked for a  Shoo Fly pie for her birthday  this year. (This is an old Pennsylvania Dutch recipe that uses flour and molasses as its base.) My mother has been a pie maker all her life and would think nothing of making pies most days. Me…not so much. Her birthday wish forced me to revisit pie making. I felt it was the least I could do – a little pay back for all the pies she made me over the years.

The problem I have been having with pies lies in the crust. Most of the flaky pie crusts I have tasted made by country cooks are full of vegetable shortening or lard. I am not happy eating or cooking with these fats and long ago switched my allegiance to butter. The few butter crust pies I have made have not been flaky and rolling them out has been something of a nightmare. That is, until this summer.

My daughter and son-in-law gave me this book a few years ago…and well, I am thinking everyone needs this book.

FullSizeRender 2.jpg

The Cook’s Book is full of techniques and recipes mastered by chefs. In this rather heavy book, I found the recipe that has altered my view of making butter crusts or  pâte brisée (shortcrust pastry). This pastry can either be made by hand or in a food processor.  For full disclosure here, I have to tell you I ran into the same problem with this recipe as I did with all of the others I have made. The recipe itself is a breeze and the dough comes together well, but like all shortcrust pastries, they call for it to be chilled in the fridge for at least two hours before rolling. This is where I broke with tradition. I recently read that it doesn’t matter when the dough is chilled – just that it be chilled before baking. I decided to roll the dough while it was still pliable and then chill it in the fridge in the pie pan. Some far better and much more experienced pastry chefs might dispute this, but all I can say is it worked for me. There was far less swearing as I was rolling out the dough and for that alone the switch-up was well worth it.

For this blueberry pie, I had only one crust, so I made it with a crumble top. I combined two online recipes  that I found for blueberry crumble pie – one from Epicurious and one from Allrecipes. I used the filling recipe and the baking temperature and time  from All Recipes and the crumble topping from Epicurious.  It turned out well. The crust was flaky and the pie delicious.

I just might turn into a pie maker after all.

Pot Luck Star

I have been a bit of a pot luck star this summer and I’m going to make you one too. Our summer gatherings here in the country tend to be pot lucks. It is an easy, affordable way for people to gather for a meal on a warm summer evening. Except for this year, I have been much more likely to bring something savoury to share rather than something sweet. That all changed when I intercepted this recipe being shared online by Canadian cook, Laura Calder, who self confessed that she couldn’t stop making them. Of course, that piqued my interest and the total simplicity of the recipe settled it for me. Since making these cookies, I have noticed that there are a number of different variations online. Some of them use salt, vanilla extract and cream of tartar,  but I find this recipe is just fine as is. I like adding the unsweetened sifted cocoa because it does seem to cut the sweetness a bit. Enjoy!

IMG_2887 Chocolate Chip Meringues (photo credit kd7167)


Chocolate Chip Meringues

Ingredients:

3 egg whites

1 cup of sugar

2 T sifted cocoa

170 g dark chocolate chips

Optional: small handful or scant 1/4 cup of roasted sliced almonds

Directions:

Whip 3 egg whites while beating in a cup of sugar a spoonful at a time. The mixture should become thick and glossy. (This usually takes about 8 minutes.) The mixture shouldn’t taste granular at this point. Fold in the sifted cocoa, the chocolate chips and the nuts if you choose to do so. Drop by spoonfuls onto parchment lined cookie sheets.

Bake at 275 for 35 minutes.